Ultimate NKM Guide 2#
NKM, (stands for Nitro Kart Map) contains and defines objects, routes, cameras, start positions and much more. In this guide you will learn, how the NKM is structured, how you create a NKM and which tools you can use for it.Contents:
- Object Categories
- NKM Editors
- NKM Creating And Editing
Section Categories
Before we start to create our NKM, we first take a look at the categories the NKM consist of.
GENERAL
OBJI: Objects
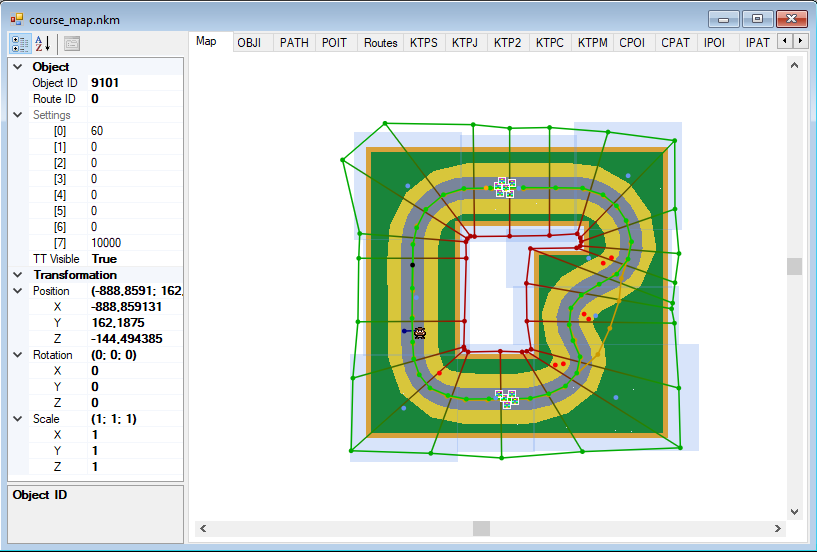
The objects for the course, such as Goombas, Pipes, Item Boxes, etc. An object is defined by its ID and has settings through arguments (args). You can set, if the object appears in Time Trial or not, which is recommended for Item Boxes.
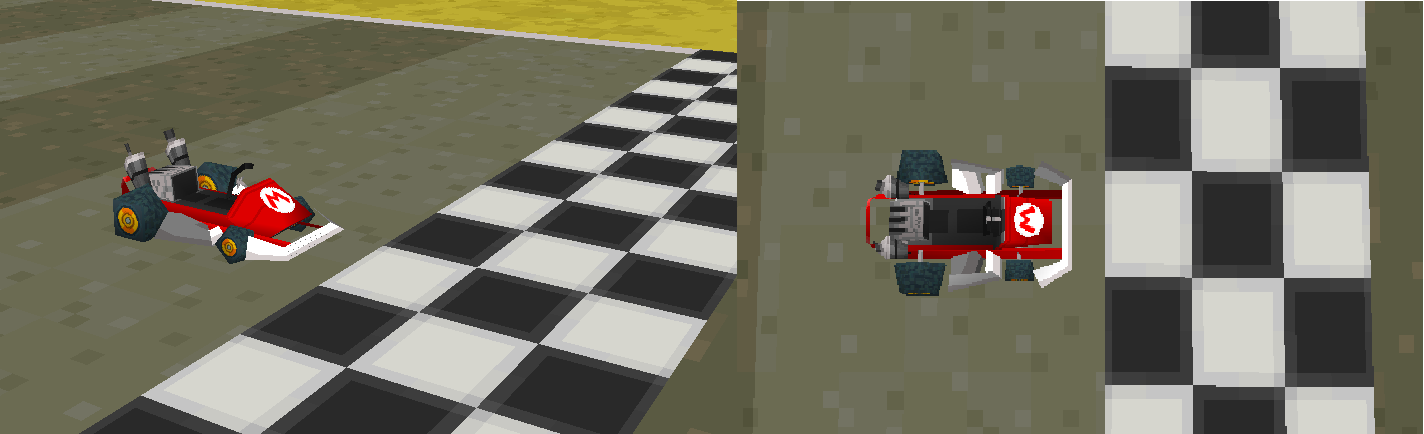
Some objects can (or needs to) have PATHs. For example Goombas, Cars or Thwomps.
Some objects need one or more model files and may other files in the "MapObj"-folder of the Course.carc to work. You can also use your own models. If the game still crashes, check if the object uses a shadow model or other files, such as animations.
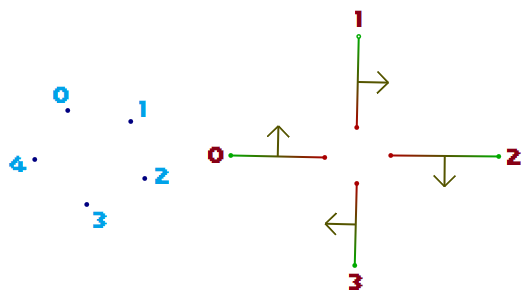
KTPS: Start position
This is the starting position, where all the drivers are placed, when the race begins.
You can place it like this:
 |
Note, that this is NOT the line, or where the lap counts! It's only the spawnpoint for the drivers!
KTPJ: Respawn Points
This are the respawn-points, where you will spawned after going out of bounds.
You must enter its ID in the Checkpoints (CPOIs), so that the game knows, at which area the game spawns you at this point (more about that later).You also need to enter the IDs from the next Enemy point (EPOI) and Item point (IPOI), otherwise, enemies will go elsewhere after a respawn, and items that follow routes (Red shell, Bullet Bill) will do the same when using them after a respawn.
KTPC: Cannon Destination
This is the point the drivers will be shot at when touching the specific collision for cannons. A race can only use one cannon destination point.
KTPM: Mission Points
These are used for Missions. The Player will be spawn there, when the mission got completed. It's also required for the success music. Not needed for a normal Track.
KTP2: Unknown Section
On original tracks, they exist before the starting line, but they do nothing. Probably planned to be a spawn point for Time Trial or to count the lap.
PATHS
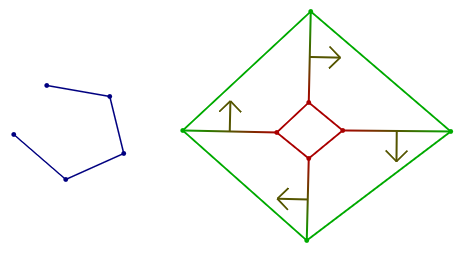
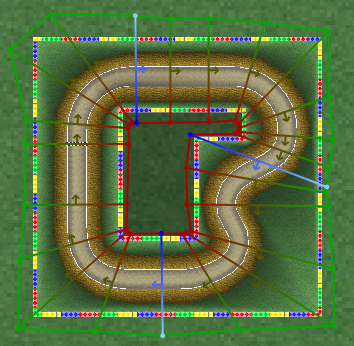
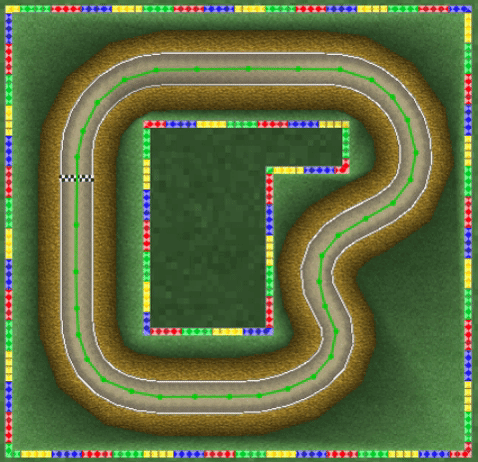
CPAT: Checkpoint Path
CPAT are connected though CPOIs.
This is the route, the drivers have to follow, to get the lap count. It also tells the game, at which rank you currently are and also defines, at which respawn point the driver will be respawn after going out of bounds.
It works like this:
A CPOI consist of two connected points. The drivers have to go through the CPOIs in order. CPOI with ID 0 is the line, where the lap counts. Some CPOI have a Key Point Value.
These defines, in which order you have to go though these CPOIs. They also split some CPOIs into groups. If you go for example through Key Point 1, only the CPOIs from 1 to 2 are active. This is used for crossing ways and for avoiding brutal shortcuts.
Important to know:
The red point of a CPOI must be placed right, while the green has to be on the left side! Remember with this: "Red is Right, Left is Luigi, Luigi is Green".
EPAT: Enemy Path
They connect EPOIs.
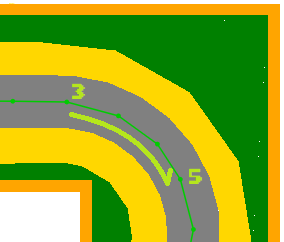
This is the path, the CPU drivers are following. The very first EPOI with ID 0 needs to be placed right after the starting line.
You can change the size of the EPOI to let the CPUs drive less robotic, so they don't follow exactly the line. (You can see the size of a EPOI in the latest version of MKToolbox)
You can make the CPUs drifting, by giving a value in the EPOI, where they should drift:
0= No action, default value
1= Start a drift to the left, with a powerslide
2= Start a drift to the left, without a powerslide (usually used for small turns, so that the CPU's can easily take the turn)
3= Start a drift to the right, with a powerslide
4= Start a drift to the right, without a powerslide (usually used for small turns, so ...)
5= End a drift
IPAT: Item Path
They connect IPOIs.
This is the path, items like Bullet Bills, red and blue shells are following. Like EPOI, you can change the size of an IPOI.
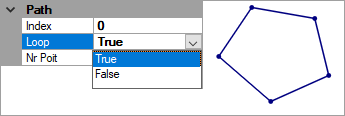
PATH: Object Path
They connect POITs. A path, that can be used for objects such as Goombas, Cars, Itemboxes, but also cameras uses Paths. They can also loop, unlike EPOI and IPOI. The POIT setting "Duration" can be used for some objects for stopping them for a specific time. Pokeys and the Sun are using this for example.
MISCELLANEOUS
AREA: Areas
These are cubic areas, used for cameraviews after race or for other effects such as Boos.
CAME: Cameras
The cameras for your course. They are used for the intro and for views after race.
STAG: Track Information
This defines general settings for the track, including the number of laps, the time of a battle, fog settings and more.
This can be edited with Mario Kart DS Course Modifier, Every File Explorer, or with Mario Kart Toolbox.
Connecting Paths
CPAT, EPAT, IPAT and PATH are routes, that consist of connected points. They can be split into more paths. Here you will find the information you need, to create your paths. A path has a Start Index for a point and a number, how many points it uses. In order to create a path, you place points in order, like this:
 |
 |
PATH also has the option to loop the path:
 |
Create two or more paths like this:
 |
So in my example, path 1 and 2 gets a 0 in COMES FROM and a 3 in GOES TO.
Path 0 gets a 1 and a 2 in the GOES TO and Path 3 gets a 1 and a 2 in COMES FROM.
NKM Editors
Since the release of new tools, NKM editing is easier than ever before! We will take a look at these editors and talk about their advantages and disadvantages.
Mario Kart DS Course Modifier
One of the very first tools made for modding Mario Kart DS. It comes with a slightly buggy, but already powerful NKM editor, which uses a birds view and the collision model for viewing.
Opening a NKM:
To edit a NKM file, extract the course.carc from the ROM and open it with Mario Kart DS Course Modifier (It can not save from rom). Make a double click on the NKM. The editor will now appear. Do a double click on your KCL file. This will show your NKM with the collision (Use an edited version of your KCL, if your KCL does not display some streets and such not exactly).
Main Controls:
-Click on an object to select it. Hold the mouse button and move the mouse to move the object
-Click with the mousewheel on an object to place it exactly on the road
Every File Explorer
It comes with an updated version of MKDS Course Modifier's NKM editor. Multiple objects can be selected and scrolling is no longer buggy.
 |
There is just one bad thing about this: The Y-automatic option got removed.
Main Controls:
-Same as Mario Kart DS Course Modifier
-Hold CTRL to select multiple objects in the list
-Hold Shift to select multiple objects in a row
Mario Kart Toolbox
This tool started as a 3D view editor for Mario Kart DS in a SM64DSe style.
Since the latest versions, it's possible to edit the NKM in a 2D birds-eye view as well, making it possible to edit your track in 3D and 2D simultaneously, inclusive the option to place the objects on the correct height automatically!
Main Controls:
-Hold left mouse button and move the mouse to move the view
-Hold right mouse button and move the mouse to rotate the view
-Mouse wheel to zoom in and out
-click on an object to select it and hold the mouse button to move it. At the Top-Right corner on the window is an icon, that can enable to move the object only on the X and Z axis.
-Hold CTR while moving, to place the object on the road
Since the latest version can do pretty much everything we need (except placing areas), you don’t really need the other NKM editors anymore. Also it has lots of other features (including copying EPAT to IPAT and vice-versa, as well as easy and fast Enemy and Item creating!)\
NKM Creating and Editing
Getting an NKM file
Okay, if you understand that all, Let's Go!
The first thing we need is an empty NKM file. You can export the course_map.nkm from one of the MR_stages. These are almost empty and are perfect templates.
If you want to use Mario Kart DS Course Modifier first, you need to export the course.carc from the ROM to open it with this tool. This is because it can not save a ROM.
If you want to use Mario Kart Toolbox first, simply open your ROM with this tool and make a double click on your course.
Start Creating
Okay. Now you can start to create, whatever you want, but I suggest to start with the starting line and the routes of the course.
Making the KTPS (Starting Line) and CPATs (Checkpoints)
The first thing we place, is the first CPOI, which is the lap counter, and the KTPS, our spawn point. Place it at the starting line (see picture).
 |
After you’re done, give some CPOIs a Key Point to prevent ultra shortcuts and to prevent a conflict with other CPATs (when they meet other CPATs, in a cross; Figure-Eight Circuit for example).
 |
CPOIs are also divided into sections. The first CPOI of an CPAT needs a Start ID for a section, while the last CPOI of a CPAT needs a Goto ID for the next section it goes. Usually, a track has just one CPAT. In this case, it should look like this:
 |
 |
Making the EPATs (Enemy Routes)
Place the first EPOI after the starting line, since it’s the first point, the CPUs are driving at.
When you enter the size of the EPOIs, be sure to make them just so big, that the "green circle" fits inside of the drivable street. On sharp curves, you should make them even smaller to prevent them to drive into walls or other hazards.
After you’re done, connect them with EPATs.
 |
 |
Making the IPATs (Item Routes)
Since the Items are usually following the same racetrack like the CPUs, you can make the IPAT just like the EPAT (the latest version of Mario Kart Toolbox has an option to copy EPOI to IPOI and vice versa). However, since Items can also easily drive through dirt, grass and more, you can also give them an extra route through shortcuts (see picture)
 |
After you’re done, connect them with IPATs.
Making the KTPJ (Respawn points)
This is your choice, where you want to place the respawn points. Look at original tracks to have a little knowledge of the placement. Rotate the KTPJ into the right direction and don't forget to enter the IDs from the next IPOI and EPOI.
Also don't forget to enter the KTPJs ID in the CPOIs! (see picture)
 |
Adding Objects
Like I told you before, an object is defined by it's ID and can have various settings. You can set, if the object appears in Time Trial or not, which is recommend for Item Boxes.
Some object can (or have to be) connected with PATHs (blue). For example Goombas, Cars or Thwomps.
Don't forget to place the models for used objects into the MapObj-folder of the Course.carc! If the game still crashes, check if the object uses a shadow model.
Adding AREAs (Optional)
Add Areas, if you want to give your track replay cameras or effects such as boos. Instead of a normal scale, they use "Length Vector" and an X,Y,Z - vector. The length Vector is the normal scale from the area, while the X,Y,Z Vectors can form the edges from the area.
Adding CAMEs (Optional)
They are used for the intro or views after race and gives your track a cool and interesting view.
Ultimate NKM Guide 2, written by Louis Miles.
Add new attachment
Only authorized users are allowed to upload new attachments.

JSPWiki v2.10.4